Thursday, February 27, 2014

Italian salsa verde


While we say that we are green with envy in English, the Italians associate positive feelings with this color, verde speranza literally meaning that green is the color of hope.
 
It makes perfect sense when you think of it: green is so vibrant, the color of all things fresh and new. Just looking out onto a green meadow or up at a canopy of leaves instantly relaxes our mind and brings peace to our soul.
 
Green in food is often associated to good health: green vegetables and fruits are rich in vitamins and fiber (think leafy greens), not to mention healthy fats (avocado, olives). Green is the color of medicinal plants and herbs used for centuries to cure all kinds of ailments.


There is a very popular green sauce in Italy that derives from an ancient recipe, presumably first brought to the country from the Middle East by the Romans, who then in turn proceeded to spread it to the present day France, Spain and Germany.
 
Each country (and in Italy specifically every region, town and household) has its own version. I spoke to friends from different areas in Piedmont, famous for its "bagnet vert" (which literally means little green dip) served with tongue or mixed boiled meats, and their families all use different ingredients and preparation methods. Some add hard-boiled egg yolks, some use both lemon and vinegar, others like to mix in some gherkins. Some prepare it a few days in advance for extra flavor, others make it fresh and chop the ingredients by hand. I even came across some recipes that require the base to be heated in a pan with olive oil.
 
 
Traditionally this sauce is used to accompany boiled meats, but it works great on grilled vegetables, toasted crusty farmer's bread or fish (we had it with swordfish the other night).
 
It takes five minutes to make and can be stored in the fridge for days.


Does a form of salsa verde exist where you come from? If so, how do you make it?
 
 
Ingredients
3 anchovies
50gr red or white wine vinegar
1 clove garlic
1 tbsp capers in vinegar
100gr extra virgin olive oil
80gr stale white bread, without crust
120gr flat leaf parsley
pepper


Cut the stale bread into cubes, after ridding it of the crust, and soak it in vinegar. Clean and chop the parsley using a knife, mezzaluna or food processor (although the traditionalists will be gasping just about now!) together with the garlic (it is a traditional ingredient, but I don't always use it), capers, anchovies, bread and olive oil.
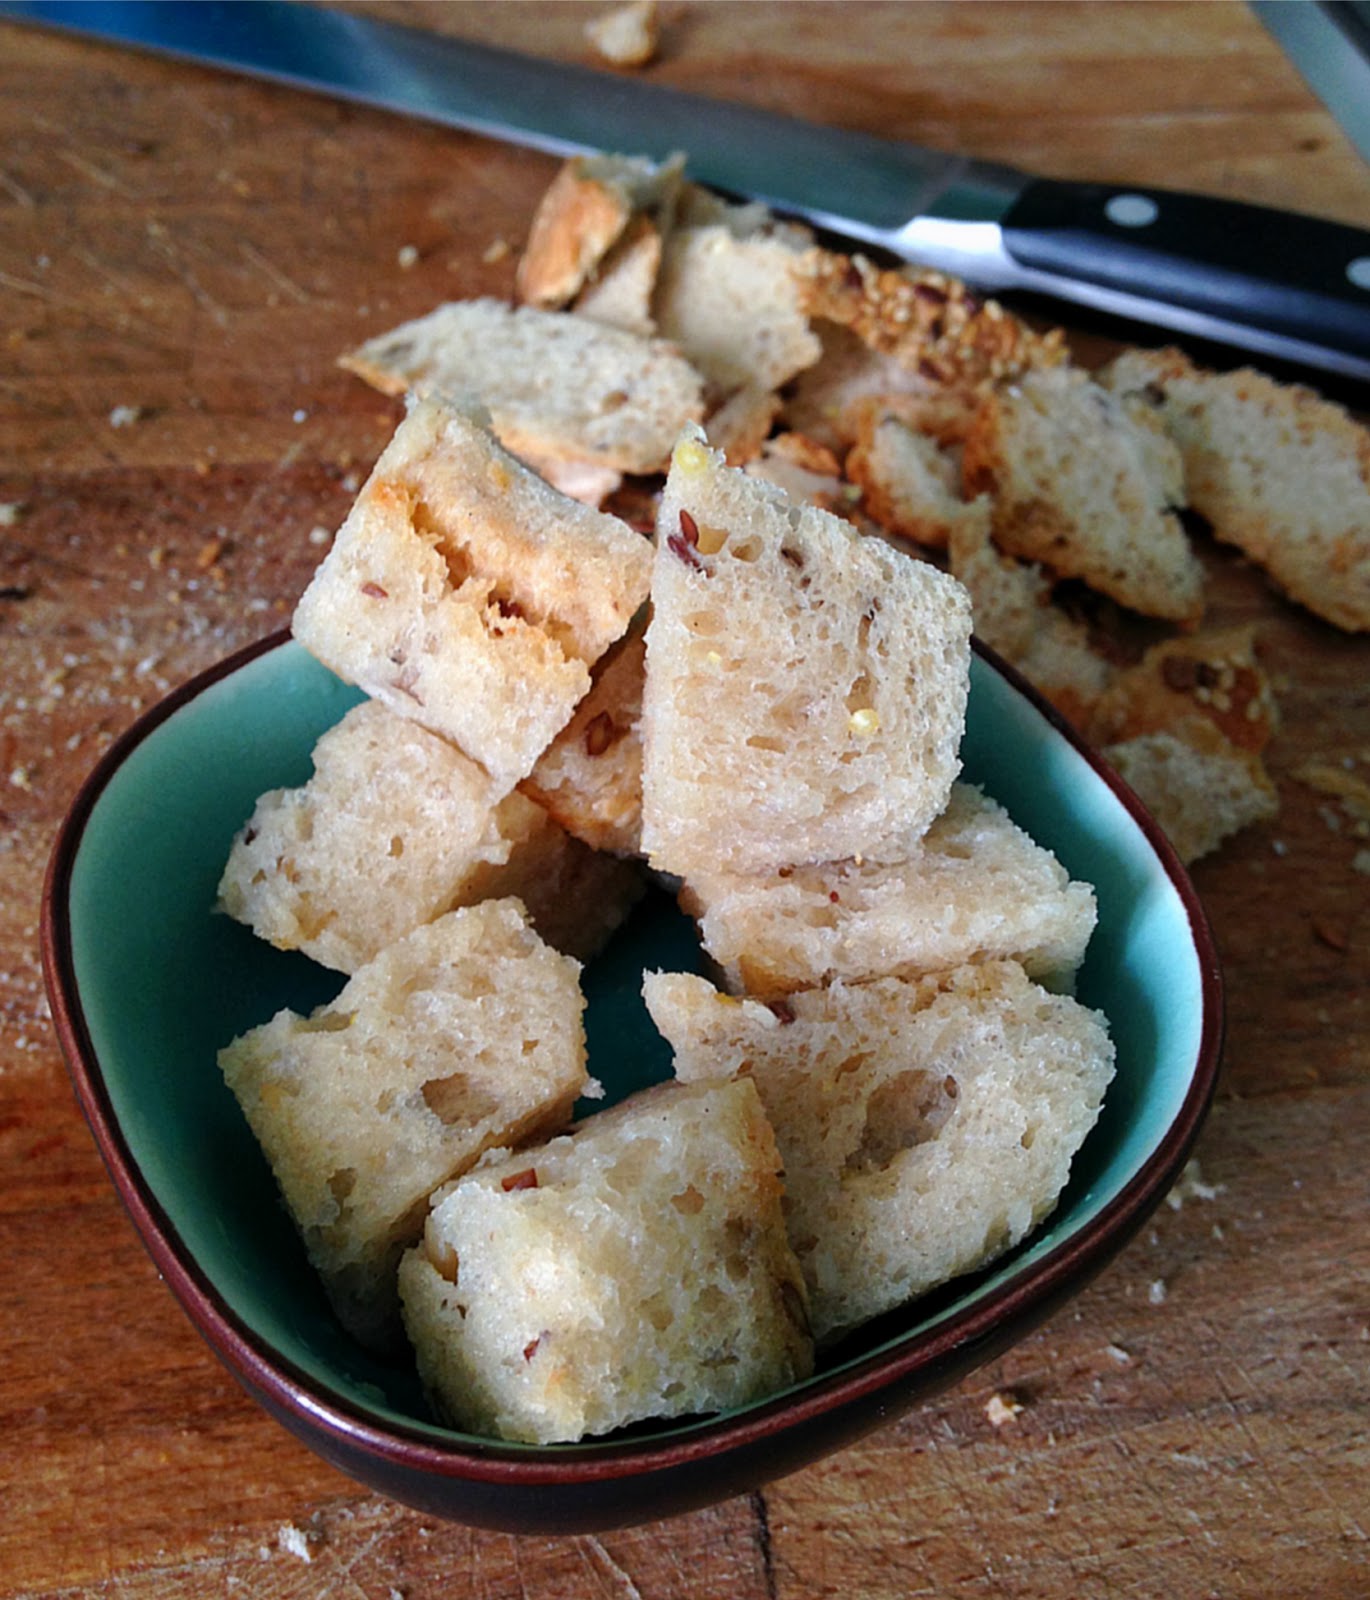
 
 
Ok, I used whole baguette... it worked fine


Wednesday, February 19, 2014

How to clean an Italian artichoke step-by-step


I have loved artichokes since I can remember, long before moving to the largest artichoke producer in the world.
 
As a young child, I remember ordering the large, green globes in French restaurants, pulling the steamed leaves off one at a time and dipping them into melted butter.
 
In Italy, however, the most commonly found artichokes are not as large and round. Sure, a larger variety exists here too, the Romanesco artichoke, but smaller varieties, some of which are extremely thorny, are more readily available. They taste every bit as delicious as the globe shaped ones, but their leaves are not quite as fleshy and getting to the deliciousness hidden in their core is a little more arduous.
 
 
Prettier than a bouquet of flowers
 
For years I was intimidated at the thought of cleaning them but it didn't matter because in most Italian markets they clean them before/while selling them.
 
That is not always the case, however. And if you buy them at the supermarket, the uncleaned ones are much cheaper than the cleaned ones, not to mention they stay fresher longer than the latter. So learning this very simple skill can be useful, especially because spring is - supposedly - right around the corner and artichokes have started appearing a-plenty around here.


The first thing you will need to prepare when cleaning an artichoke is a large bowl of water with some lemon juice or vinegar in it, to keep oxidation at bay. Artichokes (and your finger nails) will tend to turn brown as soon as you start cutting them.
 
The next step is to get rid of the outer, tougher leaves. A suggestion: always throw out more than you think you need to, even the slightest resistance is off-putting when you are chewing. Trust me.


Then you cut off the tip. Here the same rule applies: cut off more than you think necessary. You want only the tenderest part of the vegetable.


The last (or first if you prefer) step is to shorten the stem. Here is another tip: do not throw them out!!! If you peel off the stringy outer layer, the inside is perfectly edible and delicious, which makes sense when you think it is just a extention of the heart (that we all know is the best part, right?).


Whenever you have a cleaned artichoke and stem, drop it into the bowl of acidulated water.


At this point you can go many ways. You can cook the artichokes whole or in several other ways. This variety of artichoke is small enough that you can eat the whole choke without a problem. But if you are stuffing them or cutting them into pieces for a recipe, you will now proceed to cleaning the choke out.
 
If you are dealing with a whole artichoke, spread open the leaves and scoop out the inner choke with a sturdy spoon. If you will be using them in pieces anyway, cut them in halves or quarters and proceed to clean with a spoon or paring knife.


Now that they are clean, go crazy!
You can make frittata, you can braise them with potaoes, parsley and garlic like I did (the trick is that the potatoes soak up all the flavor and taste like artichoke hearts too), you can use them in a risotto or a pasta sauce. Another typical preparation is to slice them very thinly and eat them raw with Parmesan flakes and dressed with olive oil and lemon juice. It may sound bizzarre but it is delicious. Or you could steam them and preserve them in olive oil for when they will no longer be in season.


If, on the other hand, you are lazy and don't want all the fuss or you have some lovely Romanesco artichokes, skip this post (too late!) eat them like this.


Monday, February 17, 2014

Trattoria dei Bracconieri - a different way to spend a day on Lake Como


The great thing about living in a city like Milan is its proximity to so many beautiful and interesting places. And although Milan may not be considered as beautiful as other Italian towns and cities, it makes up for its looks with lots of glamour and its strategic positioning: whether you are into nature, history, architecture, art or just plain good food, when visiting Milan all you have to do is pick.

The Alps (some of the most beautiful mountains in the world), Italy's three most impressive lakes (Como, Maggiore, Garda), lovely cities (Brescia, Como, Bergamo, Turin, Mantova, Venice, Bologna) and stunning coasts (Portofino, Cinque Terre)  are just a short drive away. Not to mention the proximity of Tuscany and Rome and several European countries (France, Switzerland, Austria, Germany, Slovenia, Croatia) if you have a couple of days to spare.
 
 
When it comes to food, Milan has a lot to boast too: Michelin-starred restaurants, historical eateries, places you go to see and be seen; but I figure that if you are reading a food blog and you are planning a trip over, you probably have already researched and easily found all the information you need.


This is the main reason I don't blog about restaurants very often. This and the fact that I have two little ones, which have somewhat diminished my fancy dining experiences of late. So when I do write about a place they are usually places in the area that I discover with my family: good food, reasonable prices, child-friendly (which doesn't per se mean they are full of loud, screaming children - just that they are casual enough to bring children), the kind of place you will not find in a guide or that your hotel will most likely not recommend because they simply aren't on the radar. I tell you about the kind of off-the-beaten-track places I would like to know about when I travel.


Last week we took an American friend who was staying with us to Como. It had been raining for days when he arrived and because it is the middle of winter, it did not seem like the best time to take a boat ride to see the famous and impressive villas that surround the lake. Our plan was to take him to the city that has become the lake's namesake, Como, a town whose historical wealth (thanks to silk manufacturing and because it is a border town) is reflected in its opulent architecture, definitely worth seeing.

We however wanted our friend to be able to admire the beauty of the lake so we decided to take the funicular up to the town of Brunate, a place none of us had ever been. After a little research we found a place that perfectly suited our  needs: a simple, rustic trattoria. A place that offered a view and, according to comments on Tripadvisor, not bad, overpriced food for tourists.

Monday, February 10, 2014

Dried fruit truffles (a healthy, vegan, sugar free, slow carb snack that is much more delicious than it sounds!)


Girls are girls from the minute they enter this world, I don't care what they say about nature vs. nurture.

I never brought up my daughter as a girly girl and went as far as putting a ban on pink during my pregnancy and the first half year of her life. Admittedly, a phase that did not last very long, thanks to overeager relatives (she was and still is the only female in a pretty large group of cousins) and that unstoppable process that makes parents do a string of things they swore smugly they would never do before actually becoming one.

Nevertheless, my daughter has grown up wearing pants more than dresses and "sensible" colors so that certain clothing items can be passed down to her little brother when she grows out of them. When it comes to toys, we have never denied her Barbie dolls or princess accessories, but we try to keep a pretty gender neutral approach in general.


This has not mitigated the traits in her that are so often ascribed to the female population in the least. She is a real chatterbox, extremely curious, very observant (as in nothing goes unnoticed) and loves clothes, hair, make up and jewelry.  She has been known to make earrings out of stickers, paperclips, fruit and flowers and is always excited to receive the sparkly Disney merchandising I so abhor as presents. She is undeniably a girl. A jeans-clad, sneaker-wearing girl with a glittery soul.

If I wear an old sweater I haven't worn for a while I immediately get asked "Did you go shopping?". If she is in the kitchen doing her homework and I tell her brother off in the bedroom, you can bet your bottom dollar that her head will be sticking through the doorway, neck craning, to see what is happening. She can hear you say something from the other end of the apartment even if you think she is busy dancing and singing, and will come up and enquire about it with insistence. Discreet she is not.

She ooohs and aaaahs on the rare occasions I wear heels.

The other day, the minute I walked into the kitchen after getting ready, she looked up at the very thin stripe of eyeliner I had applied and exclaimed: "Mommy, that black line on your eyes is sooo pretty!". My son is still trying to find it.

Friday, January 31, 2014

Potato and porcini mushroom soup


There was a time in my life when I woke up every morning to what is considered one of the most breathtaking views in the world. The Dolomites, that unique part of the Italian Alps that turns pink during sunrise and sunset, were so much a part of my everyday life that I barely noticed them outside of my window.
 
I am sure that being a teenager at the time didn't help my indifference to nature, busy as I was whispering with my girlfriends, listening to my Walkman, sometimes doing homework but mostly daydreaming about some guy I had met the day before out on the slopes. In boarding school you rarely stop to smell the roses, to breathe in the fresh mountain air, to look at the silver pine trees or admire the snow sparkling in the sun.
 
Now, however, whenever I get the chance to go to the mountains - any mountains - things are very different. I gasp at the beauty that surrounds me, I rejoice in watching my children run in the tall grass and wild flowers or making snow angels in the winter. I realize those years changed me without me even noticing it. The mountains have stayed within me, in my heart and soul, and few places make me feel so at peace.


I already wrote about going back to visit those mountains. Once every few years we visit an old friend. Our kids play together, our husbands talk airplanes (seriously, how many chances are there that your high school bestie will marry a guy who is as obsessed with civil aviation as yours is?) and we reminisce about how silly and boy crazy we were (did I mention the boarding school was not co-ed?) and about the ups and downs of being a teenager. We still giggle and there is still wine, but it is no longer hidden away in a pillowcase inside a shoebox in a suitcase somewhere in the back of our closet.
 
My friend and I also sometimes collaborate. This recipe was part of a project we worked on and I couldn't not share it with you, my friends. It is a recipe from La cucina delle Dolomiti by Dino Dibona and was chosen to allow tourists to easily recreate the flavors of those mountains in their own home.  To make this you simply have to procure a package of dried porcini mushrooms, an ideal ingredient to carry back in your suitcase because they are so lightweight. If, on the other hand, you haven't been skiing in the Dolomites, luckily for you dried porcini are nowadays readily available almost anywhere and although they are pricey, a few go a long way.


In this essential and effortless soup the (once) humble ingredients really shine through. In old times people from these valleys used to prepare this kind of meal to fill their bellies and warm their bodies during the freezing months using what was available to them from farming and foraging. Potatoes held well all winter and mushrooms were plentiful in the fall and were then sliced and dried for the colder months.
 
What I loved most about the soup is the incredible flavor these few ingredients can create when combined: its is so much more than the sum of its parts. The texture is wonderful too: the soft, sweet  potato nuggets absorb all that flavor and the mushrooms add a subtle earthiness and chew. Every bite tastes and smells like you are walking through the forest, dark fronds towering over you, your steps softly sinking into the warm, dry mossy carpet.


Ingredients (4 servings)
600gr/3 medium-sized potatoes
1 liter/4 cups/35 oz. vegetable stock
100gr/3.5 oz. fresh porcini mushrooms or 50gr/1.7oz. dried porcini
50gr butter/about 3tbsp butter (or oil for a vegan recipe)
1 yellow onion
2 garlic cloves
chives, for garnish

 
Peel and thinly slice the potatoes. Peel and finely chop the onion and garlic. Clean and roughly chop the mushrooms if you are using fresh porcini. If you are using dried porcini (like I did), rinse them quickly with cold water and then soak in hot (but not boiling) water for up to an hour. Set aside the liquid when you drain them.
 
Melt the butter in a pot over low heat and add the potatoes, onion and garlic. Sauté for about 3 minutes, mixing constantly.

Pour in the stock, bring to a boil and simmer covered for about 20 minutes.

Add the porcini mushrooms. If you are using dried mushrooms, pour in part of the remaining liquid for extra flavor. 

Raise the heat and cook for another 10  minutes. Garnish with finely chopped chives and serve.


Monday, January 27, 2014

10-minute carrot and ginger pickle (and a salad to go with it)


If you ever bumped into Peter Rabbit, he would be sure to tell you that carrots are absolutely delicious, worth risking your life for in Mr. McGregor's garden. He would probably go on to tell you they are really healthy and he would ask you if you have ever seen a rabbit wearing glasses. Well, perhaps if you were four years old, and you had a very vivid imagination...
 
The truth is carrots may be good for you and quite tasty at that, but they are also pretty boring and not a vegetable you normally serve your guests, well aside from a few exceptions.


These on the other hand are sweet, they are sour, they are crunchy and they have some heat. They take 10 minutes to prepare and 10 minutes to pickle. They last in the fridge for up to a few days, probably even more, but I can't vouch for it because they have never lasted that long in our home.
 
So far we have had these carrots in a lentil salad, the chickpea salad above, in mixed green salads, with cheese and cured meats and even alongside roast chicken. You can use the leftover pickling liquid in a salad dressing with olive oil and perhaps a drizzle of sesame oil or you can just spoon it into your mouth like my 8-year old did last week. 


Once again, I have to thank Lorraine for this brilliant tip and so should you ;o)
 
Ingredients
2 large carrots, peeled into ribbons or grated
1 or 2 tsp grated ginger
4 tbsp rice wine vinegar
3 or 4 tbsp quick-dissolving sugar (like icing sugar)
1 tbsp water
1 tsp salt
1 tsp soy sauce
 
Mix together together the vinegar, sugar (I used a little under the 4 tablespoons indicated in the recipe) and salt until they dissolve completely. Add the water and soy sauce.
Peel the carrots into thin ribbons or grate them. Grate the ginger and mix into the carrots and then fit them into a jar about the size of a jam jar. Pour over the pickling liquid, making sure it completely covers the carrots. Close and pickle for about 10 minutes, turning the jar upside down halfway through. Use immediately or store in fridge for a few days.
 
 
Chickpea salad with feta, apples and pickled carrots
3 cups chickpeas
2 cups arugula
150gr feta cheese
handful fresh coriander, chopped
1/2 apple, sliced
pickled carrots, about half the amount above
 
I cooked the chickpeas, but you can just as easily use the canned variety. Rinse them well, chop up the arugula and coriander leaves, crumble in some feta cheese and add in the pickled carrots and the thinly sliced, bite-sized pieces of apple. Drizzle over some olive oil and lemon juice, mix and adjust for salt.


Tuesday, January 21, 2014

Granola two ways: everything and maple pecan


Despite my non-resolutions, I will admit to having started a healthier, lighter eating regime this month, eschewing carbs and processed sugar as much as possible.
 
This new routine involves eating oats in as many forms possible in the morning rather than the five or ten two or three wholewheat cookies I normally hastily dunk into my caffe latte every morning at my office desk. It also involves thinking and preparing ahead but turns out to be less of a bother than I thought it would be. I just have to remember to boil and soak some steel cut oats in water about once a week or alternatively mix and bake my own granola, of which I have already made several batches.


I am aware that making your own granola is not the discovery of the century and that many of you are already doing it, but for those of you who don't, it is so easy and so much healthier than buying those (often) sugar, salt and fat-laden industrial ones, of which there is very little choice here to begin with. So I am indeed very excited, just as excited as I was about last week's lentils ... what can I say, I guess I am an enthusiastic kinda gal, although I promise to spare you Dr. Seuss this time round.
 
I have made a variety of combinations with very different ingredients and two different methods, both of which worked very well for me, and I cannot help patting myself on the shoulder everytime I take a bite: not only do I get to clean out my pantry and freezer (I cannot begin to tell you the amount of dried fruit and nuts I have stashed away), but I can choose from an endless combination of ingredients, I have control of what I am feeding my family, how sweet I want my breakfast cereal to be and also how much fat, sugar or salt I want or rather don't want to use. Not to mention I get to decide whether I want big clusters, small clusters or none at all.


We have been eating it with cold milk, warm milk or yogurt as breakfast and after-school snacks and we have yet to get bored of it. I am already thinking dried figs, medjool dates, apricots, pistachios, flax seeds, sunflower seeds, raisins. My kids are already dreaming of chocolate chips in all colors or sizes and peanut butter chips...
 
Quick note: I have been using instant oats because I had a large tin to use up and they worked well but normally granola recipes call for rolled oats. You can go either way. Also, play around with the ingredients you like by substituting, adding or taking any of them. Last but not least, I recently read some recipes that did not call for any kind of fat in the preparation, so I will be trying that next.*

*Six months later I am still making this weekly: I now use rolled oats or 6-grain mixes, I have cut the amount of maple syrup and add flax/linseed to the mix, and the maple granola is definitely my favorite although I sometimes swap pecans with a seed mix (sesame, sunflower, pumpkin, linseed etc.).


Everything granola (makes enough for one baking tray)
1/3 cup honey
1/3 cup butter
1tsp muscovado sugar
1 tsp poppy seeds
1/4 cup unsweetened, dried coconut
2 tbsp sesame seeds
1/4 tsp ground cinnamon
1/2 cup almonds, roughly chopped
3 cups rolled/instant oats 
a pinch of salt
1/2 cup mixed red berries

Preheat the oven to 175°C/350°F.
Melt butter and honey (you can melt the honey using the bain marie method or in the microwave) and mix together in a large bowl. Add in all the other ingredients and mix well using a spatula.
Line a baking tray with parchment paper or aluminum foil and spread the mixture evenly. Bake in the oven for about 20 minutes, mixing halfway through. Let cool, crumble and mix in the berries. Store in an airtight container.

Maple pecan granola clusters (makes enough for one baking tray) - with updates
3 1/2 cups instant oats (I have now switched to a 6-grain rolled mix) 
1/2 cup wheat germ
1/4 cup ground flax/linseed
1 tsp cinnamon, optional
1/2 to 1 cup pecans, roughly chopped
a pinch of salt
1/4 cup canola oil or other
2/3 cup pure maple syrup (I have since reduced the amount to 1/4 cup approximately)


Preheat oven to 150°C/300°F.
In a large bowl mix together all the dry ingredients. In a small bowl combine oil and syrup and then pour over the dry ingredients. Mix well with a spatula. Spread evenly onto a previously lined baking tray and bake without mixing for about 30 minutes . Let cool, break up in to pieces and store in an airtight container.